Purchase Inquiry in Dynamics 365 Finance and Operations
When managing purchases in your business, it’s essential to validate details with your vendor before finalizing an order. This is where a purchase inquiry comes into play. A purchase inquiry allows you to review and confirm the contents of a purchase order, including product quality and delivery dates, before the purchase order is confirmed. Essentially, it serves as a preliminary check to ensure everything is in order.
For example, imagine you’re ordering new office furniture. Before confirming the order, you might want to validate the vendor’s delivery date and the quality of the products. By creating a purchase inquiry, you can print or email this information to the vendor for their confirmation. This step helps prevent any misunderstandings and ensures you get exactly what you need.
In Microsoft Dynamics 365 Finance and Operations (D365FO), creating a purchase inquiry is a straightforward process. This guide will walk you through the steps to create a purchase inquiry, helping you streamline your procurement activities and enhance communication with your vendors.
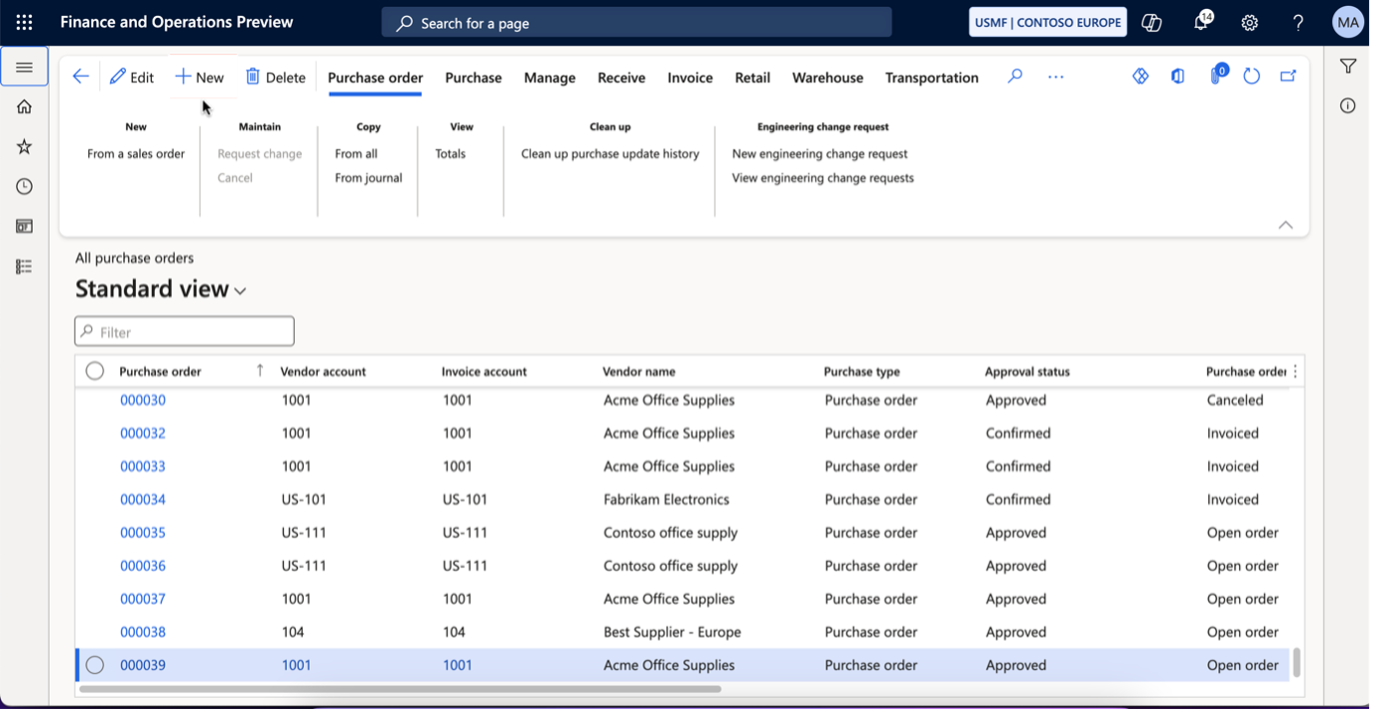
Step 1: Access Purchase Orders
- Start by going to the Procurement and Sourcing module in D365FO.
- Click on All Purchase Orders. This lets you see a list of your current orders, helping you decide whether to update an existing one or create a new order.

Step 2: Select a Purchase Order
- Next, you can choose any existing purchase order or click the New button to make a new one.
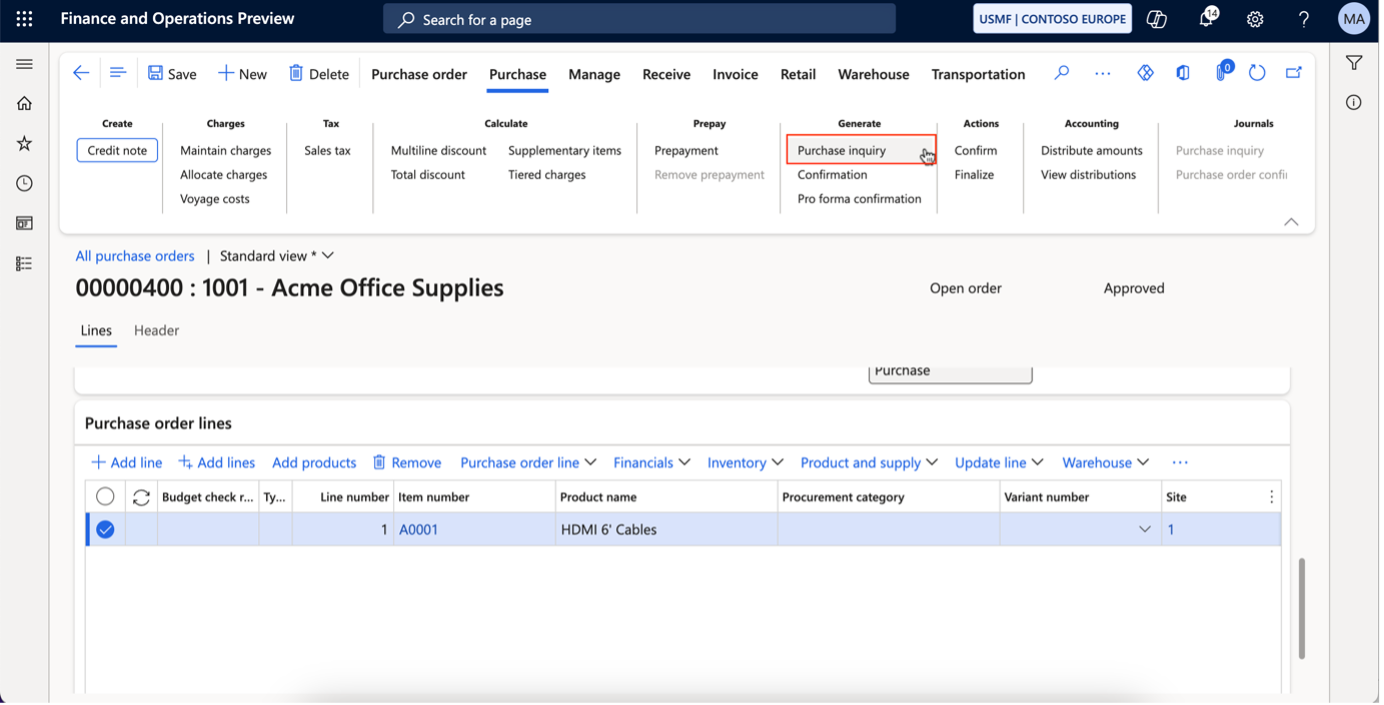
Step 3: Generate the Purchase inquiry.
- Once your selected purchase order is opened, now you can create the purchase inquiry. In the Navigation Pane, under the Purchase section, find and select Purchase Inquiry in the Generate column. This generates an inquiry based on your purchase order details.
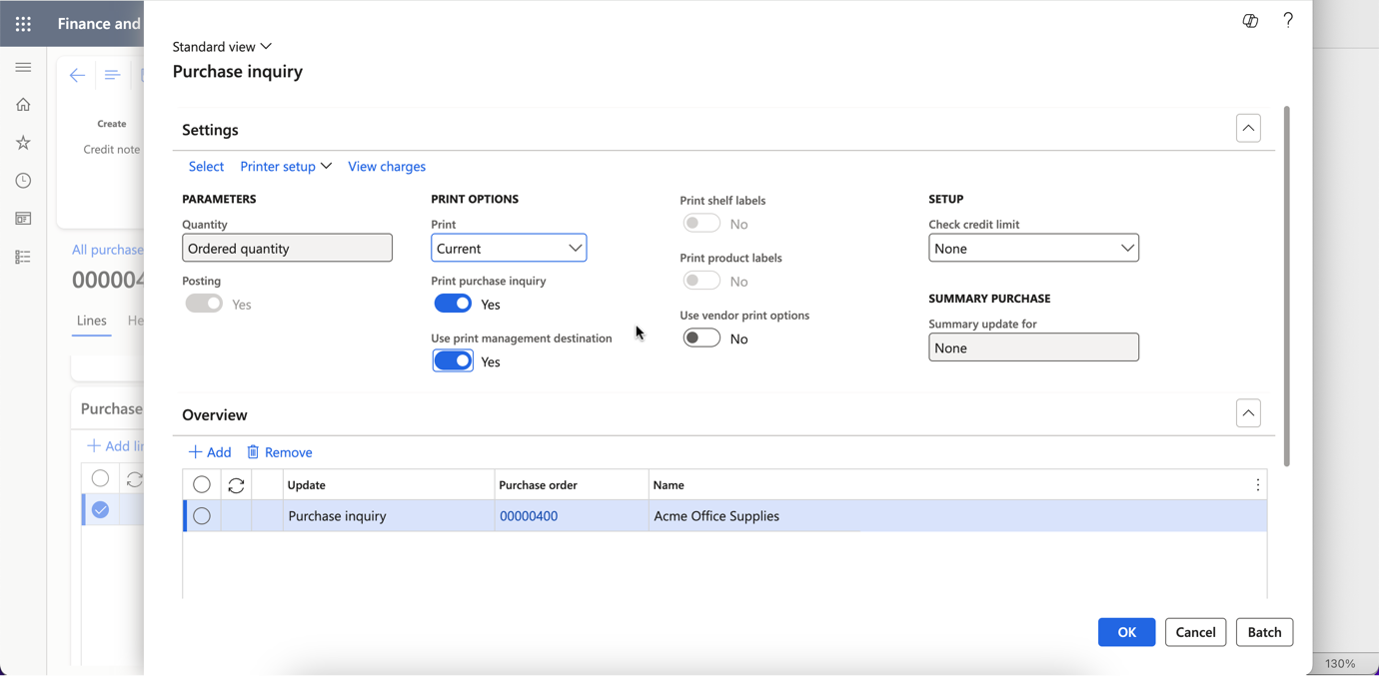
Step 4: Print or Email the Purchase Inquiry
Once you have the purchase inquiry, you can either print it or email it to the vendor for confirmation.
To Print the Inquiry
Select the Print option. You can set up the Print Management Destination if you need to. Then click Print to get a hard copy. This printed inquiry serves as a formal record for you and your vendor.
To Email the Inquiry:
If you prefer to email, click on the Email option in the inquiry screen. D365FO will send the inquiry directly to the vendor’s email address, making communication quick and easy.
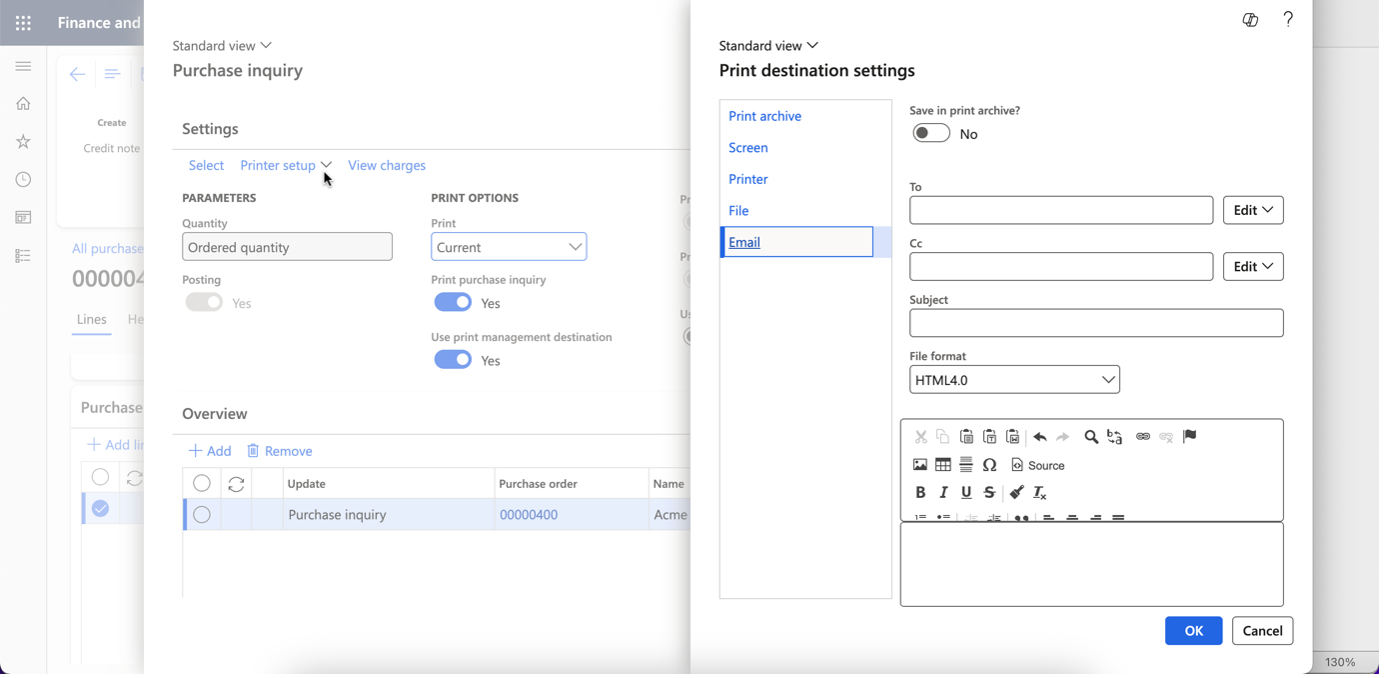
Step 5: Posting the Purchase Inquiry
- After you send the inquiry, keep track of its status. When you send a Purchase Inquiry, the PO status changes to “In external review,” indicating that you’re awaiting a vendor confirmation. You can print or preview the original purchase inquiry from the Journal
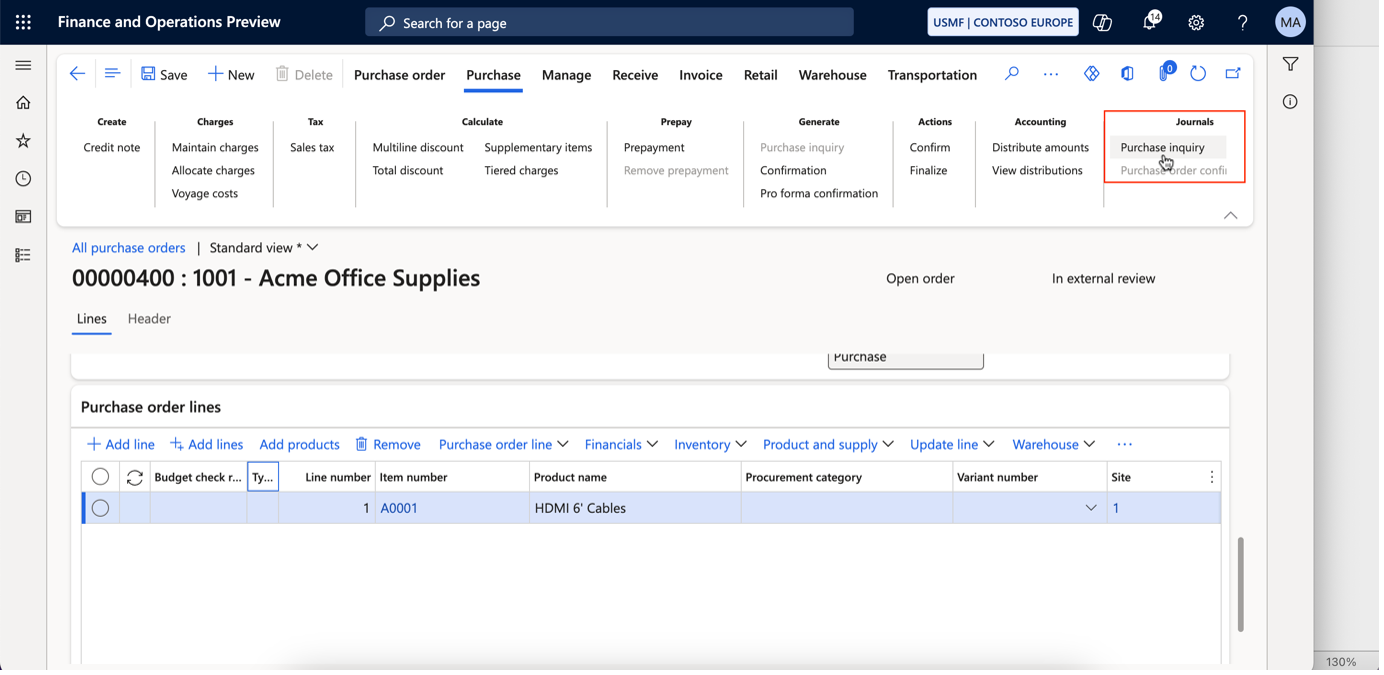
- Once you post the inquiry, the Purchase Inquiry button will be disabled, showing that it has been sent and cannot be modified. However, one of the best advantages of D365FO is that if your vendor requests a change, you can edit the purchase order, which will re-enable the Purchase Inquiry button.
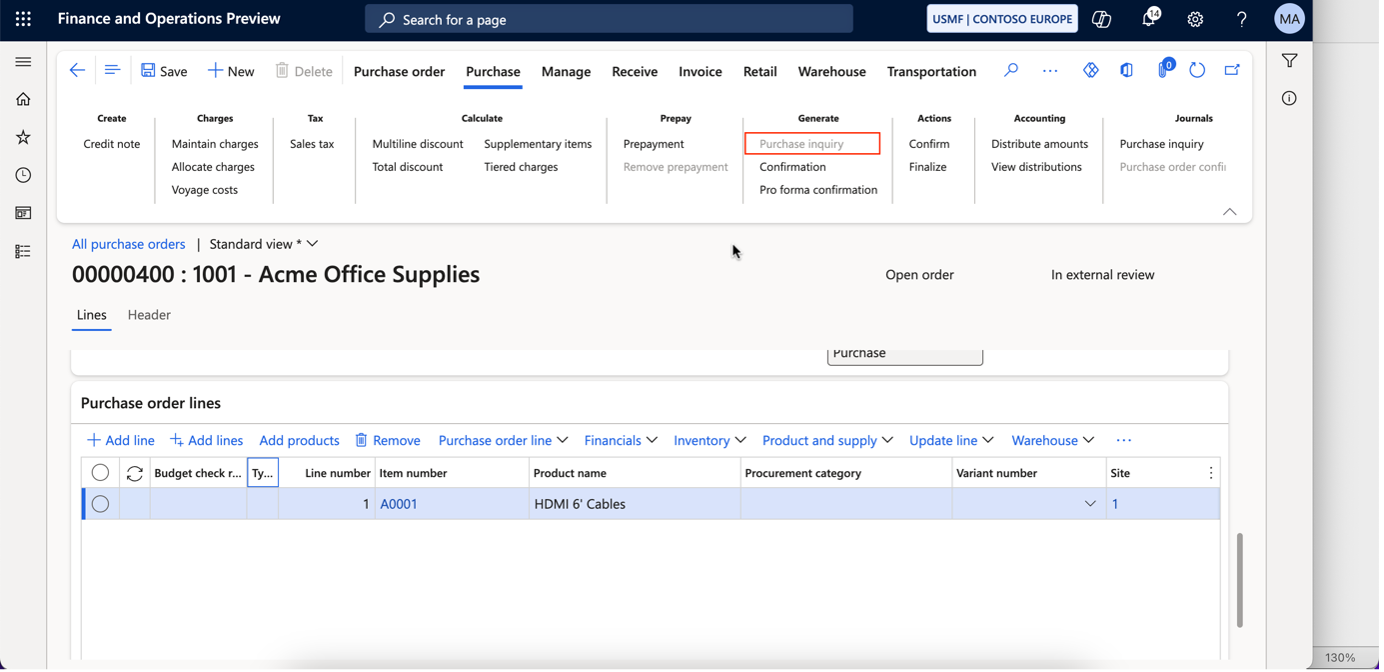
- You can then compare both versions of the inquiry in the Journals to track changes.
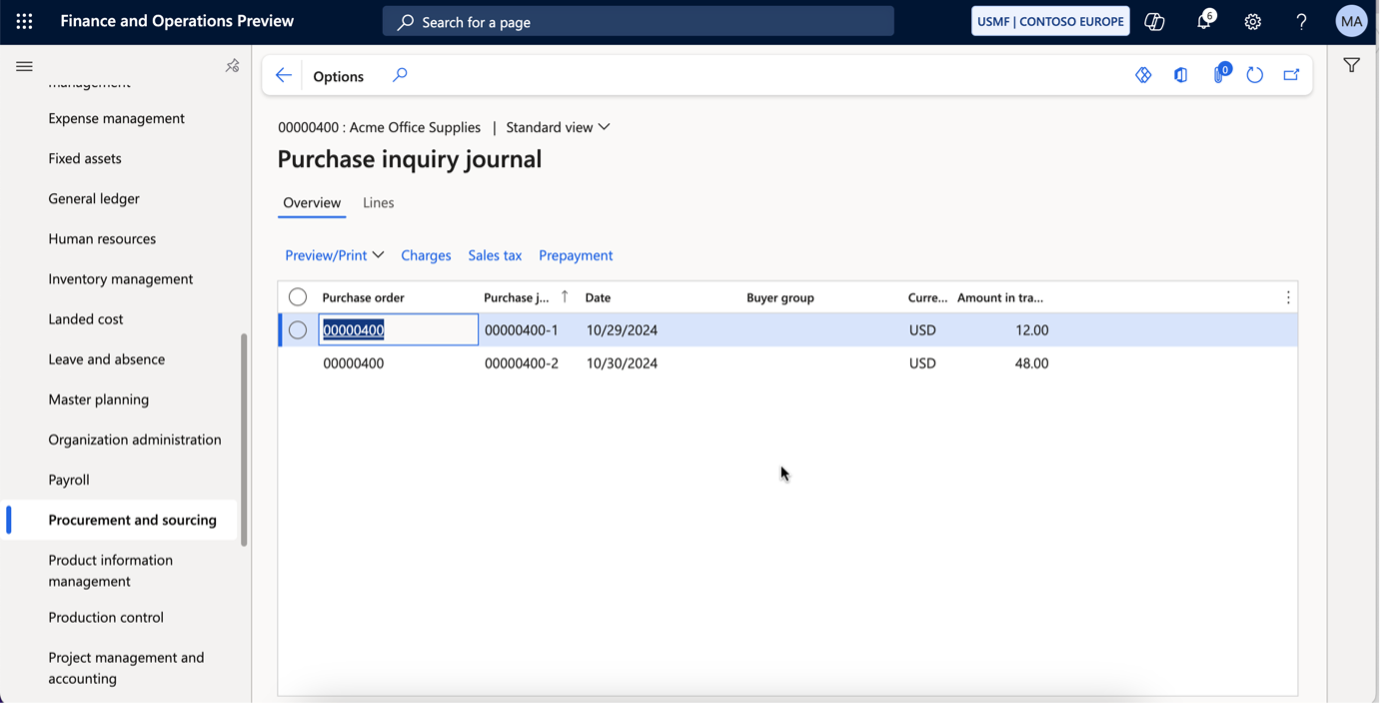
Step 6: Review the Purchase Inquiry in the Journal
- Go back to the Journal section to see all postings related to your purchase inquiry.
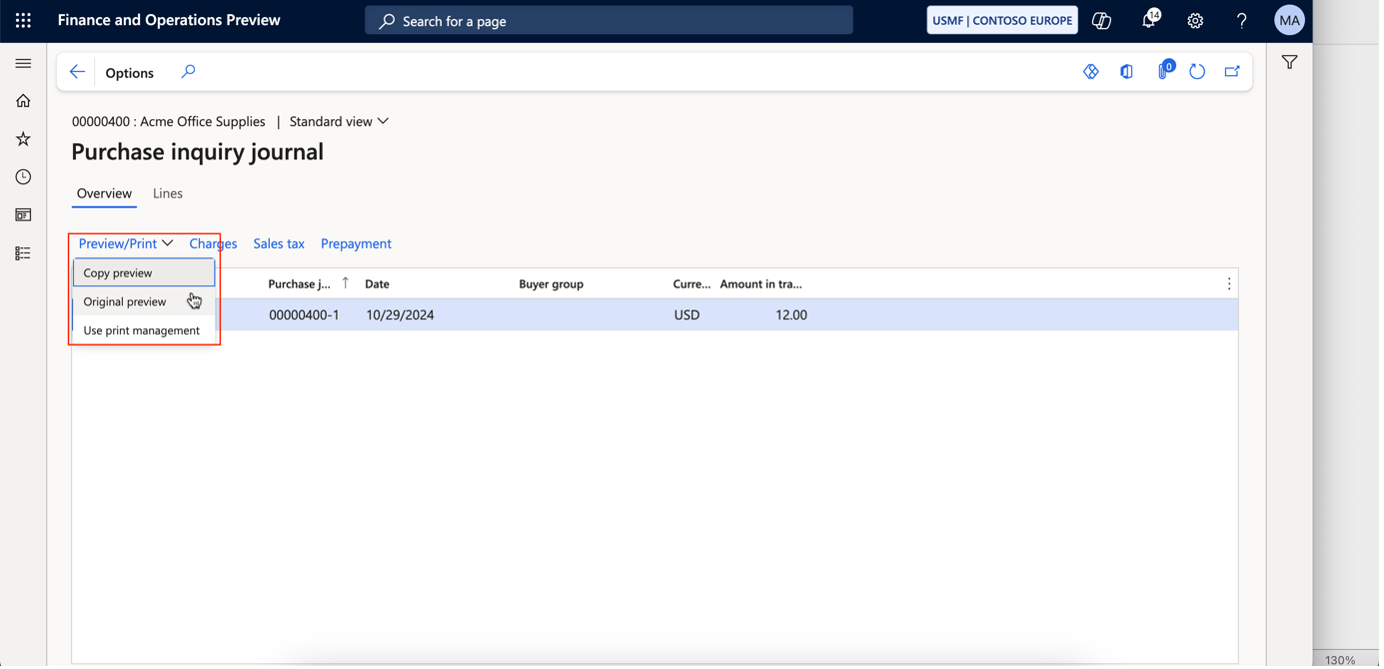
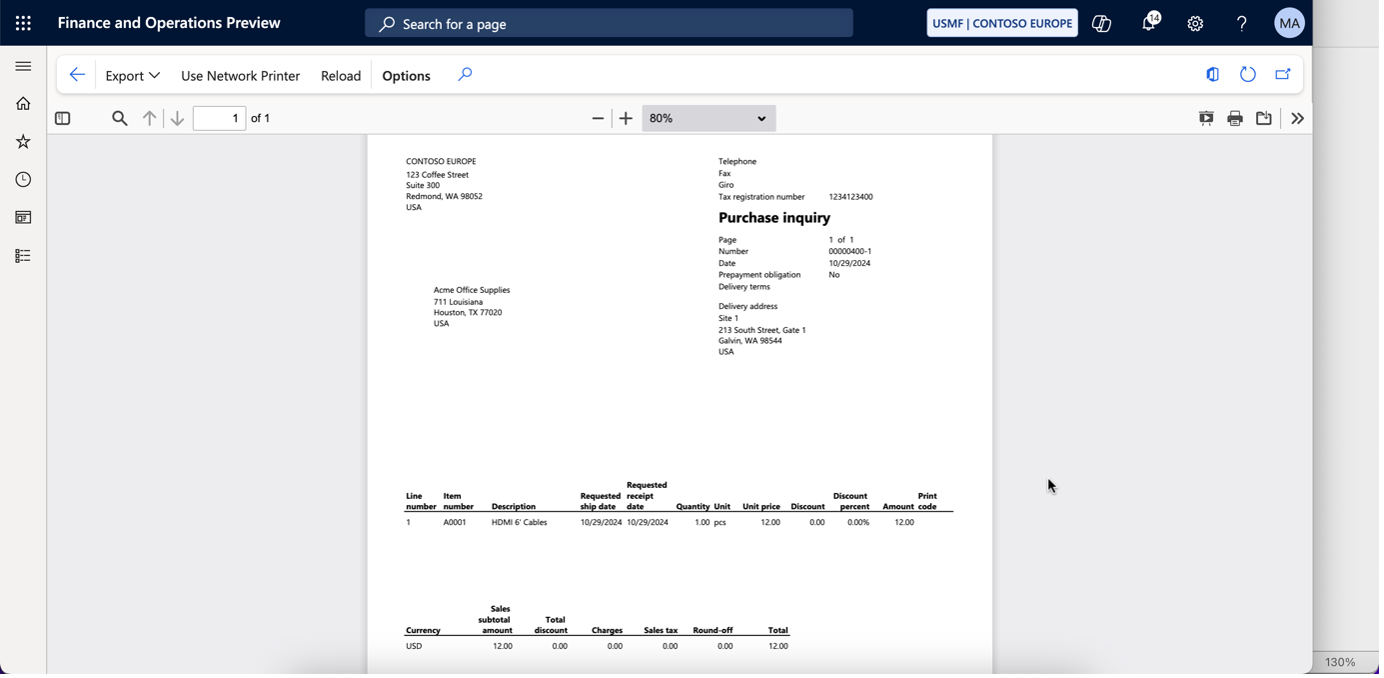
2. Here, you can review the original inquiry sent to the vendor, ensuring everything is correct.
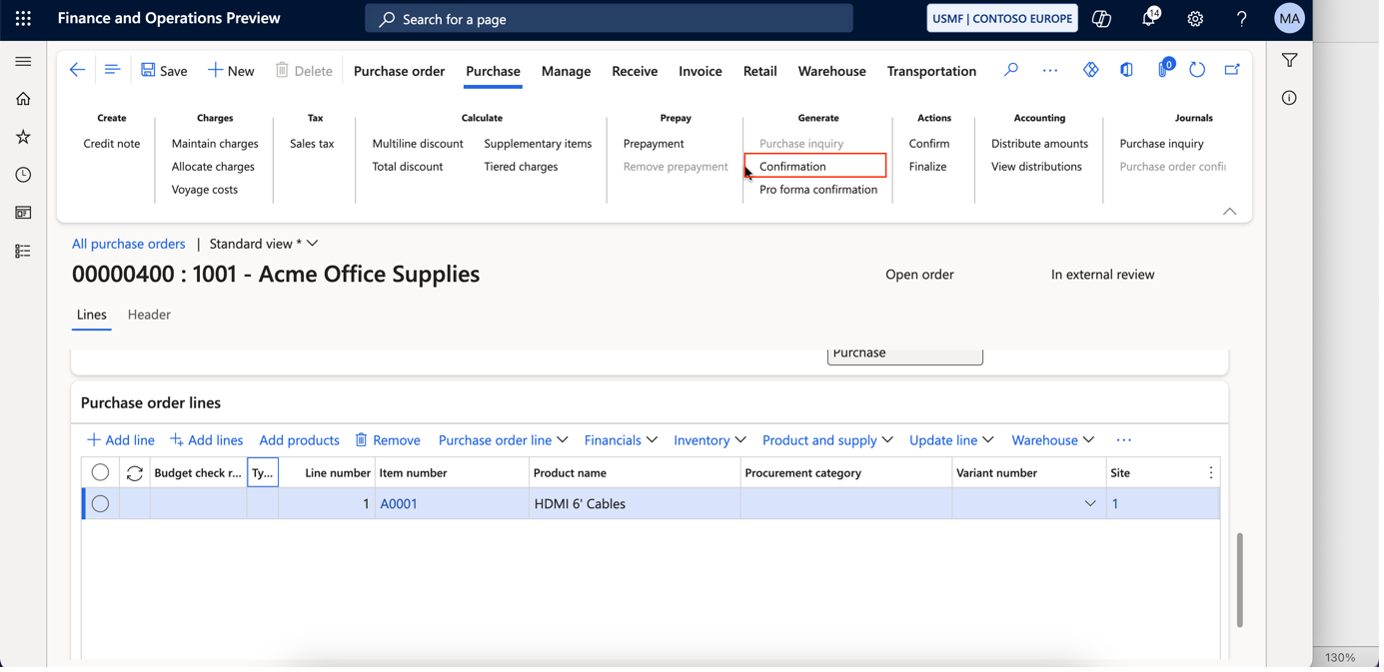
Step 7: Confirm the Purchase Order
Once you receive confirmation from the vendor, return to the purchase order screen and confirm the purchase order to officially complete the purchasing process, keeping everyone aligned.
Conclusion
Creating a purchase inquiry in D365FO is a straightforward process that improves your purchasing efficiency and vendor communication. By following these simple steps, you can keep your procurement activities organized and effective. Mastering this process not only helps streamline purchases but also builds strong relationships with your suppliers, driving your business success.